By
Dragons Lair Designs May 20th 2013 – Any Similarity to any other
Tutorial is coincidental, DO NOT DISTRIBUTE WITHOUT MY EXPRESS PERMISSION
If you would like to use any tutorial please ask me first.
Tutorial is coincidental, DO NOT DISTRIBUTE WITHOUT MY EXPRESS PERMISSION
If you would like to use any tutorial please ask me first.
Ok I have been asked to show you how to make this cute little Mini album, and belive me it is easy peasey, you end up with a 6 x 6 Album with 8 6 x 6 pages and 8 3 x 6 Flaps to decorate and add tags or photo's to, so lets get started ......

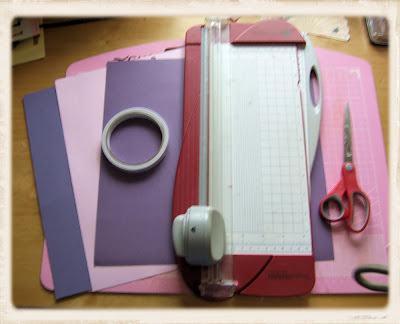
What you will need to start off with is a paper cutter or scissors, 3 sheets of 12 x 12 Paper and sticky tape or glue, whichever you prefer.
I am making mine using plain card so i can decorate it with patterned paper afterwards, but you could go straight for patterned papers the choice is yours, as long as you have 3 12 x 12 sheets of strong paper .

Ok lets cut the paper up and get ready to start ......
In my case i am using three shades of purple, decide where you want your colours in the album then start cutting .
Base Card ( Outer Card and Accordion insert)
Cut at 1 x 6 x 12 & 1 x 5.75 x 12
Inner Flaps Colour 2
2 x 5.75 x 12
Center Flap Colour 3
1 x 5.75 x 12
2 x 6 x 6

Ok are we all ready to score our card ????
Front Cover (Base Card)
Score at 2.75 & 3 on each side
Accordion Piece ( 5 x 12)
Score at 4 & 8
Colour 3 - Score at 3 & 9

OK thats the hard work done now lets put it together :)
Lay out your 3 inside pieces with your centre Colour in the middle, we are now going to glue the edge of one and stick the flaps together to make one long sheet
See Photo below
Fold the pages you have just glued so you have a square then flip it over and glue the back.
Taking the Front Cover ( Scored at 2.75 x 3 on both ends, Centre the pages on the middle of the cover, and stick down.

We now have 3 bits left the 2 6 x 6 squares and the accordion
fold, the Accordion goes in the middle of the book and is glued down to flap open downwards, Now you can glue this in now OR wait until you have decorated your pages if you are going to cover it in patterned paper, I will be sticking mine down later.

Once folded you should have something like this ......
Ok guys this is the last step :)
Taking the two 6 x 6 squares glue the front flaps as shown below and then attatch your 6 x 6 Squares.

And there we have it a mini book all ready to decorate :)
Heres one i made earlier so you can see a finished book.

You can add pockets to your pages as below, so you can decorate tags and pop them in, OR you can mat photo's and slide them in too, giving you loads of options for more photo's been added.
I hope you enjoyed this tutorial and feel the urge to make one, If you do i would love to see, feel free to link your page below :)
All thats left now is to have fun.
HAPPY CRAFTING :)


Thank you for the tutorial, this album looks gorgeous and love the colours and papers.
ReplyDeleteHugs
Linda xxx
That so cool just stunning, i love mading mini book to. Great keep sake.
ReplyDeleteTracey x
Finally made it over.. Stunning book hun, and thank you for the tut xxx
ReplyDeleteGreat tutorial. Clear pictures and instructions. Thank you.
ReplyDeleteFantastic project & fantastic tutorial. Thanks foe sharing xxx
ReplyDeleteThank you so much for the tutorial, I might get round to it one day! lol xx
ReplyDelete